
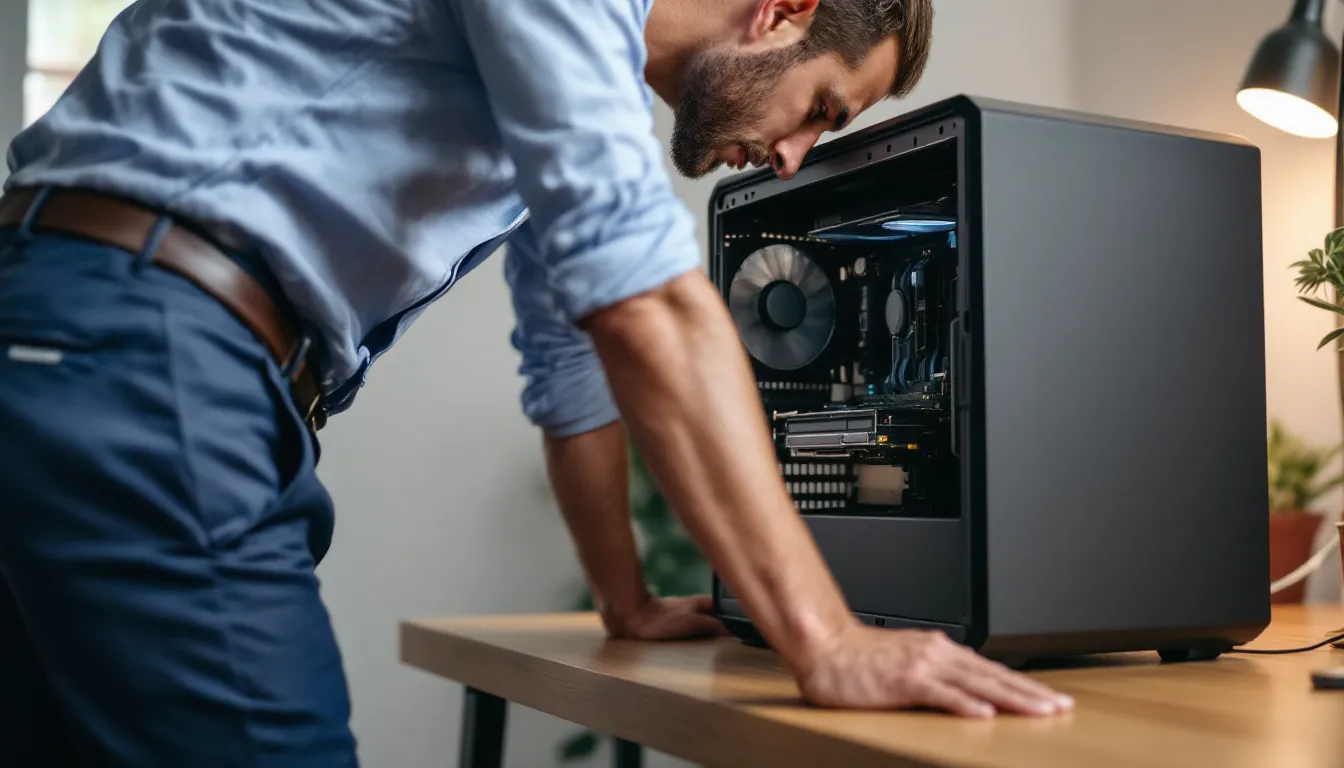

Building a gaming PC for under $100 sounds impossible in 2026, right? With RTX 5000 series cards pushing past $1,500 and mid-range CPUs alone costing $200+, the idea seems laughable. But here’s the thing: it’s not about chasing ultra settings or 144fps. It’s about understanding what’s actually achievable at this price point and being smart about where you spend every single dollar.
This isn’t a guide for building the next streaming rig or running Cyberpunk 2077 at max settings. This is for the gamer who wants to play League, CS2, or indie titles without very costly. Maybe you’re a student with limited funds, testing the waters before committing to PC gaming, or just curious if it can be done. The short answer? Yes, but with significant compromises and a heavy reliance on the used market. Let’s break down exactly how to make it happen.
Key Takeaways
- A cheap gaming PC under 100 dollars is achievable by prioritizing the used market, where office liquidations and refurbished systems offer the best value for budget builders.
- Realistic expectations are essential: expect 720p gaming at low-to-medium settings with 30-60fps, making esports titles like League of Legends, CS2, and Valorant your best performance targets.
- The GPU is your most impactful upgrade path—starting with integrated graphics or a used GTX 750 Ti can transform a budget build’s gaming capability as you save for future upgrades.
- Critical components to prioritize in your cheap gaming PC build are a reliable CPU (4th-7th gen Intel or Ryzen 1st/2nd gen), 8GB RAM minimum, and a PSU from established brands to avoid hardware failure.
- Avoid red flags when buying used hardware, including items without power-on demonstrations, physical damage, vague seller descriptions, and proprietary OEM parts that limit upgrade potential.
- Optimization through Windows tweaks, disabling graphics effects, and lowering resolution before texture quality can significantly improve frame rates without additional hardware investment.
Setting Realistic Expectations: What Gaming Performance Can $100 Actually Deliver?
Let’s get brutally honest: a $100 gaming PC in 2026 won’t run anything modern at 1080p high settings. You’re looking at 720p gaming, low to medium settings, and frame rates that hover between 30-60fps depending on the title. Esports games like Valorant, League of Legends, and CS2 are your sweet spot, titles optimized for competitive play that scale down beautifully.
The hardware you’ll be working with is typically 6-10 years old. Think 4th to 6th gen Intel Core processors, early Ryzen chips, or integrated graphics solutions that were mid-range back in 2015-2018. You’re not getting RGB lighting, tempered glass, or any of the modern conveniences. You’re getting functional hardware that can boot Windows 11 (or more likely, Windows 10) and run games at playable frame rates.
Expect thermal throttling if cooling isn’t adequate. Expect longer load times if you’re stuck with an HDD instead of an SSD. Expect to spend time tweaking settings and optimizing performance rather than just clicking “Play.” The $100 budget is entry-level in the truest sense, it proves PC gaming is accessible, but it demands patience and realistic goals.
Your biggest limitation will be the GPU. At this price point, you’re either relying on integrated graphics from an older APU or hunting for ancient dedicated cards like the GT 1030 or GTX 750 Ti on the used market. These cards can handle esports titles and older AAA games, but forget about anything released after 2020 without major compromises.
The Used Market Strategy: Your Best Path to Ultra-Budget Gaming
New parts at $100? Forget it. The used market is your only viable path. You’re competing with other budget builders, so timing and patience matter. Check listings daily, know your component values, and be ready to act fast when a deal appears.
Where to Find Reliable Used Gaming PC Components
Facebook Marketplace and Craigslist are goldmines for local pickups. You avoid shipping costs, can inspect hardware before buying, and sometimes negotiate better deals in person. Look for office PC liquidations, businesses upgrading their Dell Optiplex or HP ProDesk fleets often sell complete systems for $50-$80. These machines typically have decent CPUs (i5-4570, i5-6500) and enough RAM to get started.
eBay offers broader selection but adds shipping costs that eat into your budget. Filter by “Buy It Now” and “Auction” to catch deals. Watch for listings ending at odd hours, fewer bidders means better prices. r/hardwareswap on Reddit is another solid option where enthusiasts sell components with some community accountability through confirmed trades.
Local computer repair shops sometimes sell salvaged parts or older systems they’ve taken in trade. Thrift stores occasionally have towers, though finding gaming-capable hardware is pure luck. University surplus sales can be incredible if you’re near a college, institutions often liquidate old equipment in bulk.
Don’t overlook free listings. Freecycle and “Free” sections on Craigslist occasionally have working PCs people just want gone. Even if the system itself is weak, you might salvage a case, PSU, or storage drive.
Red Flags to Avoid When Buying Used Hardware
First red flag: no power-on demonstration. If the seller can’t or won’t show it booting to BIOS or desktop, walk away. “It worked last time I used it” means nothing. Insist on seeing POST at minimum.
Watch for obvious physical damage. Bent CPU pins are unfixable for most people. Cracked PCBs on motherboards or GPUs mean instability or complete failure. Blown capacitors (bulging or leaking components on the board) indicate the hardware is dying.
Excessive dust and grime suggest neglect. While cleanable, it often correlates with overheating issues and shortened component lifespan. If the inside looks like it survived a sandstorm, the seller probably never maintained it.
Be skeptical of listings with vague descriptions like “gaming PC, runs great.” without specs. Sellers who know their hardware will list exact models. Vague listings often hide weak components or issues. Similarly, unrealistic performance claims are warning signs, if someone says their 2012 PC “runs everything on ultra,” they’re either clueless or lying.
Avoid proprietary OEM PSUs from brands like Dell or HP if you plan to upgrade later. These often use non-standard connectors or form factors that limit your options. Same goes for BTX-format motherboards, they’re obsolete and incompatible with standard cases.
Finally, trust your instincts on the seller. If communication is dodgy, they’re pushy about payment methods (wire transfer, gift cards), or the deal feels too good to be true, it probably is. Meet in public places, bring a friend, and never pay before seeing the hardware work.
Component-by-Component Breakdown for a $100 Gaming Build
Breaking down a $100 budget across all necessary components requires surgical precision. Every dollar matters, and you’ll need to prioritize ruthlessly.
CPU: Targeting Older Intel or AMD Processors
Your CPU target is 4th through 7th gen Intel Core processors or first/second-gen AMD Ryzen chips. The Intel i5-4570 through i5-7500 offer quad-core performance that’s still viable for gaming in 2026. These chips were workhorses in their day and handle esports titles without breaking a sweat. Expect to pay $15-$30 for these CPUs on the used market.
AMD’s Ryzen 3 1200 or Ryzen 5 1400 are excellent if you find them in budget. They offer better multi-threading than comparable Intel chips from that era, which helps with modern games that use more cores. First-gen Ryzen can often be found for $20-$40.
Avoid anything older than 4th gen Intel (Haswell) unless it’s practically free. The performance drop-off becomes too steep, and compatibility with newer software gets questionable. On the AMD side, skip the FX series, terrible power efficiency and gaming performance that doesn’t justify even bargain prices.
Don’t overlook older Intel i3 processors if they’re significantly cheaper. The i3-6100 or i3-8100, while dual or quad-core, can still run lighter games and free up budget for other components.
GPU: Integrated Graphics vs. Dedicated Budget Cards
This is your toughest choice. Integrated graphics from an AMD APU (like the Ryzen 3 2200G or Ryzen 5 2400G) can handle esports titles at 720p-1080p low settings. These APUs include Vega graphics that punch above typical integrated solutions. If you find a complete system with a 2200G for under $100, that’s often your best bet.
Dedicated GPUs in budget range are slim pickings. The GT 1030 (the GDDR5 version, NOT the DDR4 variant which is significantly worse) can be found for $30-$50 used. It’ll outperform most integrated graphics but barely. The GTX 750 Ti is the golden find if you can score one for $40-$50, it’s aged remarkably well for esports and indie titles.
AMD’s R7 250 or R7 360 occasionally appear for $20-$30. Performance is modest but serviceable. Much like reviews on Tom’s Hardware from that era indicate, these cards were budget options even when new, but they still function.
Avoid cards with less than 2GB VRAM, you’ll hit limitations immediately in anything modern. Also skip the GTX 730, GT 710, and similar ultra-low-end cards. They’re barely better than integrated graphics and waste money.
Motherboard, RAM, and Storage Considerations
Motherboards and RAM usually come bundled if you’re buying a complete used system, which is the smart move. A bare LGA 1150, 1151, or AM4 motherboard runs $20-$40 used. Make sure it has all the necessary mounting hardware and I/O shield, missing parts add cost and frustration.
RAM needs are straightforward: 8GB minimum, preferably DDR4 but DDR3 is acceptable for older platforms. Expect to pay $10-$20 for 8GB. Dual-channel (2x4GB) offers slight performance gains over single-channel, worth pursuing if the price is identical. Anything less than 8GB will bottleneck modern Windows 10/11 before you even launch a game.
Storage is where you make tough choices. A 500GB HDD can be found for $5-$10, sometimes free in bulk system purchases. It’s slow, hurts load times, but functions. A 120GB SSD costs $10-$15 used and dramatically improves system responsiveness. If forced to choose, prioritize capacity, you can live with slow loads but can’t install games if storage is full. Ideal scenario: snag both, use SSD for Windows and one primary game, HDD for everything else.
Power Supply and Case: Cutting Costs Safely
PSUs are where budget builders take unnecessary risks. Never cheap out to dangerous levels. A failing PSU can kill every other component. That said, you don’t need a 750W gold-rated modular unit for this build.
Target 300-400W PSUs from known brands: Corsair, EVGA, Seasonic, or even decent OEM units from Dell or HP. Expect $10-$20. Many used office PCs include adequate PSUs for low-power builds. If your total system draw is under 200W (which it should be with no dedicated GPU or a low-power one), even an older branded 300W PSU works.
Red flags: Unknown Chinese brands with suspicious ratings (“500W.” that weighs half a pound), missing safety certifications, visible damage or corrosion. PSUs don’t age gracefully, capacitors degrade. If it’s 10+ years old, even from a good brand, reconsider.
Cases are the easiest cost-cut. Any ATX tower that holds your components and has functional front I/O works. Expect $5-$15 or free if you’re patient. Aesthetics don’t matter, airflow does. Make sure it fits your motherboard form factor and has at least one functioning fan mount. Missing side panels or front bezels? Who cares. Ugly beige tower from 2008? Perfect.
Some builders skip cases entirely, running open-air builds on cardboard or wood. Not recommended for safety and dust reasons, but technically functional if you’re desperate to save $10.
Sample $100 Gaming PC Build Configurations
Let’s put theory into practice with two realistic build paths that stay within budget based on actual 2026 used market pricing.
The Office PC Upgrade Build ($80-$100)
This approach starts with a used office PC and adds a low-profile GPU if needed.
Base System: Dell Optiplex 7040 or HP ProDesk 600 G2 – $60-$80
- CPU: Intel i5-6500 (quad-core, 3.2GHz base)
- RAM: 8GB DDR4
- Storage: 500GB HDD (included)
- PSU: 240W OEM (adequate for this build)
- Case: Standard office tower
Upgrade Option: GT 1030 low-profile – $35-$40 (if budget allows)
This build banks on finding a good deal on a complete office system. The i5-6500’s integrated HD 530 graphics can run League, CS2, and Valorant at 720p-1080p low settings getting 60+ fps. If you find the base system for $60, adding the GT 1030 pushes total to $95-$100 and significantly improves performance.
Pros: Complete system, Windows possibly included, reliable OEM components
Cons: Limited upgrade path due to proprietary PSU and case, no flashy gaming aesthetic
The Full Used Component Build ($90-$100)
This route pieces together individual components for potentially better gaming performance.
- CPU: Intel i5-4570 or Ryzen 3 1200 – $20-$25
- Motherboard: Compatible board (H81/B85 or A320/B350) with RAM – $30-$40
- RAM: 8GB DDR3/DDR4 (often bundled with mobo)
- GPU: GTX 750 Ti – $45-$50
- Storage: 500GB HDD – $5-$10 (or free)
- PSU: Generic 400W from old system – $10
- Case: Free/cheap ATX tower – $0-$5
Total: $90-$100
The GTX 750 Ti is the star here, it doesn’t require external power connectors on most models, draws only 60W, and delivers respectable 1080p low-medium performance on older titles. This card aged incredibly well and remains relevant for budget builders.
Pros: Better gaming performance than integrated graphics, full control over components
Cons: Requires more hunting, no OS included, potential compatibility troubleshooting
Both builds are viable. The office PC route is simpler and faster if you find the right deal. The component route offers better gaming performance if you’re willing to invest the time hunting and assembling.
What Games Can You Actually Play on a $100 Gaming PC?
Let’s get specific about actual performance across different game categories. Expectations need to match reality.
Esports and Competitive Titles
This is where budget builds shine. Esports games are designed to run on lower-end hardware to maximize the player base.
League of Legends: 1080p low settings, 80-120fps on integrated graphics (HD 530), 100-144fps with a GT 1030 or GTX 750 Ti. Medium settings still hit 60fps easily.
CS2 (Counter-Strike 2): More demanding than CS:GO was, but still achievable. 720p low settings get 50-70fps on integrated graphics. With a dedicated GPU like the 750 Ti, 1080p low maintains 60-80fps. Not ideal for competitive play where every frame matters, but playable.
Valorant: Optimized brilliantly. 1080p low hits 60-100fps on integrated graphics, 100+ fps with budget dedicated GPUs. Medium settings are viable if you’re not chasing 144fps.
Dota 2: Similar to League, runs smoothly at 1080p low with 70-100fps on integrated graphics. This game scales remarkably well.
Rocket League: Surprisingly demanding on graphics but still manageable. 720p low gets 45-60fps on integrated, 1080p low hits 50-70fps with a 750 Ti.
Fortnite: Playable at 720p low settings, 30-50fps on integrated graphics, 50-75fps with a budget GPU. Not the competitive 144fps experience, but functional.
Indie Games and Retro Gaming
Indie titles and older games are perfect for ultra-budget builds. Technical demands are low, and many are designed with accessibility in mind.
Stardew Valley, Terraria, Hollow Knight, Celeste, Undertale: All run flawlessly at 1080p on any hardware in this budget range. These games don’t push graphics, they focus on gameplay.
Hades, Dead Cells, Binding of Isaac: Smooth 60fps at 1080p even on integrated graphics. These roguelikes are CPU-light and GPU-light.
Retro gaming via emulation is excellent. SNES, N64, PS1, and even PS2/GameCube emulation works on these systems. A Ryzen 3 1200 or i5-6500 handles emulators like Dolphin, PCSX2, or RetroArch without issues. You’re essentially building an all-in-one retro console that also plays modern esports titles.
Older PC titles from the 2010-2015 era run surprisingly well: Portal 2, Half-Life 2, Skyrim (2011), Fallout: New Vegas, BioShock Infinite. These games were designed for hardware that’s now considered ancient, making your $100 build perfectly adequate.
AAA Games: What’s Possible at Low Settings
Modern AAA gaming is where compromises become painful, but it’s not entirely off the table.
GTA V (2015): Still one of the most-played games. 1080p low settings get 30-45fps on integrated graphics, 50-65fps with a GTX 750 Ti. Playable, though you’ll want to drop to 900p for smoother performance.
Minecraft Java Edition: Depends heavily on settings and mods. Vanilla Minecraft runs fine at 1080p, 60+ fps. Add shaders or heavy mod packs and you’ll struggle.
Older Call of Duty titles (Black Ops 2, MW3, etc.): 1080p low-medium settings, 45-60fps. These games are well-optimized for older hardware.
Modern AAA titles (2022-2026 releases): Mostly off-limits. Games like Starfield, Cyberpunk 2077, Baldur’s Gate 3 won’t run acceptably even at 720p lowest settings. The hardware simply lacks the horsepower. Expect single-digit fps or failure to launch.
Competitive settings for these titles often demand higher frame rates than your hardware can deliver. For casual play and story-driven experiences in older AAA games, a $100 PC is viable. For bleeding-edge titles, it’s not happening.
Optimization Tips to Maximize Performance on Ultra-Budget Hardware
Hardware alone won’t cut it. Software optimization and smart settings adjustments can squeeze out significantly better performance.
Software Tweaks and Windows Optimization
Start with a clean Windows install. If your used PC came with bloatware-loaded OEM Windows, wipe it and reinstall. Windows 10 is preferable to Windows 11 on older hardware, lower system requirements and better compatibility.
Disable startup programs aggressively. Press Win+R, type msconfig, and under the Startup tab, disable everything except essential drivers. Every background process steals RAM and CPU cycles you need for games.
Turn off Windows visual effects. Right-click This PC → Properties → Advanced system settings → Performance Settings → Adjust for best performance. Looks uglier, runs faster.
Game Mode in Windows 10/11 can help by prioritizing game processes. Enable it in Settings → Gaming → Game Mode. Results vary by system, but it’s worth testing.
Disable Windows Update during gaming sessions. Updates love to trigger mid-game, killing performance. Set active hours or temporarily pause updates when playing.
Use Razer Cortex or similar game boosters to automatically close background processes when launching games. These tools are hit-or-miss but can provide 5-10% performance gains on constrained systems.
Keep drivers updated, especially GPU drivers. Even for older cards like the 750 Ti, driver updates occasionally include optimizations. Use DDU (Display Driver Uninstaller) when switching between AMD and Nvidia cards to avoid conflicts.
Consider overclocking if you’re comfortable with it. Older Intel CPUs on Z-series boards can often squeeze out another 10-15% performance. RAM overclocking or enabling XMP profiles (if supported) provides measurable gains. Don’t push too hard, your cooling is likely minimal, and stability matters more than an extra 200MHz.
In-Game Settings for Best Frame Rates
Every game offers different settings, but certain adjustments universally improve performance with minimal visual impact.
Drop resolution before dropping texture quality. 900p or 720p looks acceptable on smaller monitors and provides huge fps gains. Use your monitor’s native resolution scaled down, not stretched, to maintain aspect ratio.
Texture quality can often stay at medium. Textures use VRAM more than processing power. If you have 2GB+ VRAM, medium textures won’t hurt fps much. Drop to low only if you’re VRAM-limited.
Shadows are fps killers. Set to low or off. Shadows require significant GPU and CPU processing for minimal gameplay benefit. This is your first setting to minimize.
Anti-aliasing (AA) should be off or set to the lowest option (FXAA). AA smooths jagged edges but hammers performance. At lower resolutions, it’s less noticeable anyway.
View distance/draw distance: Lower this significantly. You don’t need to see across the entire map. Reducing draw distance cuts the number of objects the GPU must render.
Post-processing effects (motion blur, bloom, depth of field, lens flare): Turn all of these off. They’re GPU-intensive eye candy that many players disable even on high-end systems. Much like optimization guides on PC Gamer suggest, disabling these effects often improves both performance and clarity.
V-sync: Disable it. V-sync caps your frame rate to your monitor’s refresh rate and adds input lag. Let frames run unlocked for smoother gameplay.
Frame rate caps: Conversely, consider capping fps at 60 if your system bounces between 50-80fps. Consistent frame times feel smoother than variable fps, even if the average is higher.
Test settings incrementally. Change one setting at a time, test performance, and find the balance between visual quality and frame rate that works for you. Many games have “Low” and “Very Low” presets, start with Very Low, ensure the game runs smoothly, then selectively increase settings you care about.
Upgrade Path: Turning Your $100 PC Into a Better Gaming Machine
A $100 PC shouldn’t be viewed as the endgame. It’s a foundation for incremental improvements as budget allows.
Which Components to Upgrade First
The GPU is your highest-impact upgrade. If you started with integrated graphics, adding even a GTX 1050 Ti ($60-$80 used) or RX 570 ($70-$90 used) transforms your gaming capability. These cards handle 1080p medium settings in most games and open access to AAA titles from 2018-2021.
Second priority: SSD for boot drive. If you’re running an HDD, a 240GB SSD ($20-$25) makes your entire system feel twice as fast. Install Windows and your most-played game on it. The quality-of-life improvement is massive, boot times drop from 2 minutes to 15 seconds, game loads shrink dramatically.
Third: RAM upgrade to 16GB. Once you’re running modern games beyond esports titles, 8GB becomes limiting. Adding another 8GB stick ($15-$25) provides headroom for multi-tasking and games with higher memory demands.
CPU upgrades are tricky. If you’re on an LGA 1150 or 1151 platform, jumping from an i5-4570 to an i7-4770 or i5-6500 to an i7-6700 costs $40-$60 and provides 20-30% gains in CPU-heavy titles. On AM4, going from Ryzen 3 1200 to Ryzen 5 1600 or 2600 ($50-$70 used) is worthwhile.
Don’t upgrade the PSU unless you’re adding a power-hungry GPU. If you’re stepping up to an RX 580 or GTX 1060, you’ll need a proper 450W+ PSU ($30-$40). For anything lower-power, your existing PSU likely suffices.
Case upgrades are pure aesthetics. Only consider it if airflow is genuinely problematic and temps are throttling performance.
Budget Upgrade Timeline and Recommendations
Here’s a realistic upgrade path spread over 6-12 months:
Month 1-2 (starting with $100 base build): Use the system as-is. Learn its limitations, optimize settings, see what games you actually want to play. Don’t rush upgrades until you understand your needs.
Month 3-4 (+$25-$50 saved): Add an SSD if you don’t have one, or upgrade GPU if you’re on integrated graphics. Which you prioritize depends on whether performance or load times bother you more.
Month 5-6 (+$40-$70 saved): GPU upgrade if you haven’t already, or add RAM to 16GB. By now you should know which games you play most and whether you’re GPU-limited or RAM-limited.
Month 7-9 (+$50-$80 saved): Consider a better GPU (1050 Ti, RX 570) or CPU upgrade if you’re bottlenecked. Check your frame rates and usage stats, if GPU is constantly at 100% but CPU is at 50%, GPU upgrade makes sense. Reverse that, consider CPU.
Month 10-12 (+$30-$50 saved): PSU upgrade if needed, additional storage, or save toward a more significant jump (like a GTX 1060 or RX 580).
Research before buying on platforms like TechRadar to ensure you’re getting good value and compatibility. By month 12, your initial $100 investment plus $200-$300 in upgrades puts you at a respectable 1080p medium-high gaming system, leagues beyond where you started.
Sell old components as you upgrade. That GT 1030 you started with? Flip it for $25-$30 when you upgrade to a 1050 Ti. Your original 8GB RAM? Sell it for $10-$15. This recoups some cost and keeps the upgrade cycle affordable.
The key is patience. Rushing upgrades or buying new instead of used blows the budget. Stay disciplined, hunt deals, and your $100 starter PC evolves into something genuinely capable.
Alternatives to Building: Refurbished and Pre-Built Options Under $100
Building isn’t for everyone. If troubleshooting compatibility issues or assembling components sounds intimidating, pre-built options exist.
Refurbished office PCs are the most common. Retailers like Newegg, Amazon, and eBay sell refurbished Dell Optiplex, HP ProDesk, and Lenovo ThinkCentre systems for $80-$150. Filter your search aggressively, you want minimum i5-4th gen CPU and 8GB RAM. Many come with Windows 10 pre-installed and a warranty (30-90 days typically).
The catch: these rarely include dedicated GPUs. You’re getting a functional office machine with integrated graphics. For esports and indie titles, that’s sufficient. For anything more demanding, you’ll need to add a low-profile GPU later, which pushes total cost to $120-$140.
Local liquidation sales occasionally offer insane deals. Businesses upgrading entire offices sometimes sell pallets of old PCs for $20-$40 each. Finding these requires monitoring auction sites and surplus listings, but the savings are substantial.
Thrift stores and pawn shops are wildly inconsistent but occasionally have functional PCs under $100. Success rate is low, maybe 1 in 20 visits yields something useful. But if you’re already shopping there, keep an eye out.
Free listings on Craigslist, Facebook Marketplace, and Freecycle sometimes have working PCs people want gone. These are usually older systems owners don’t want to bother selling. Perfect for budget builds, even if underpowered, they provide components like cases, PSUs, and storage you can use.
Avoid big-box store “gaming PCs” under $100. They don’t exist, and anything marketed as such at that price is e-waste with a flashy case. Also skip those “tiny form factor” PCs unless you confirm they support low-profile GPUs, many don’t have PCIe slots or adequate PSUs for upgrades.
Pre-built options trade convenience for upgrade limitations. OEM systems with proprietary parts restrict future upgrades. But for someone who wants to plug-and-play immediately, a refurbished office PC for $80-$100 is a viable entry point into PC gaming.
Conclusion
Building a gaming PC under $100 in 2026 is possible, but it requires realistic expectations, patience hunting the used market, and comfort with older hardware. You’re not getting 1440p AAA gaming, you’re getting access to esports titles, indie games, retro emulation, and older AAA games at modest settings. For many gamers on tight budgets, that’s enough.
The path forward depends on your situation. If you want the simplest route, hunt for a refurbished office PC with an i5-6500 or similar and call it done. If you’re after better gaming performance and enjoy tinkering, piece together components with a focus on finding a used GTX 750 Ti or GT 1030. Either way, view this as the start of an upgrade journey, not the final destination.
The beauty of PC gaming isn’t just the high-end rigs with RGB everything, it’s the accessibility and scalability. A $100 entry point proves anyone can get started. From there, you upgrade incrementally, learn as you go, and eventually build something that matches your ambitions. The question isn’t whether you can build a gaming PC under $100. You can. The real question is whether you’re patient enough to make it work.