
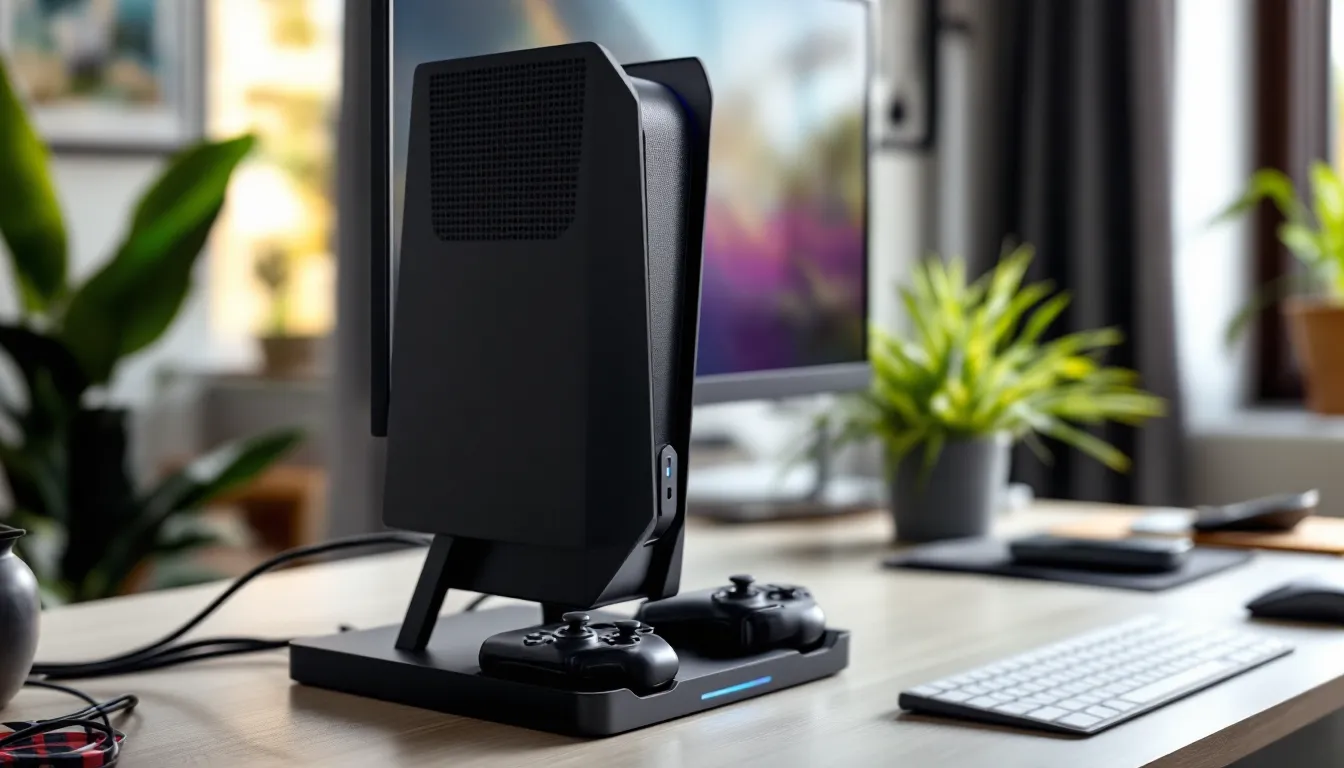

A gaming console sitting directly on a carpet or shoved into an entertainment center without proper airflow isn’t just a messy look, it’s a recipe for thermal throttling, dust buildup, and potentially bricked hardware. As consoles like the PS5 and Xbox Series X push more power and generate more heat than ever, how you position and support your system matters more than cosmetic appeal alone.
A dedicated gaming console stand addresses these concerns while solving common frustrations: tangled cables snaking across your desk, controllers scattered on the floor, and limited space in increasingly compact gaming setups. Whether someone’s building their first battlestation or optimizing a multi-console collection, the right stand transforms chaos into a clean, functional hub. This guide breaks down everything gamers need to know in 2026, from vertical vs. horizontal configurations to ventilation design, cable management, and console-specific solutions that actually work.
Key Takeaways
- A gaming console stand prevents thermal throttling, dust buildup, and hardware damage by providing proper airflow and elevation, directly extending console lifespan from five to ten years.
- Vertical gaming console stands reduce desk footprint by 50-70% while improving heat dissipation through natural convection, making them ideal for modern PS5 and Xbox Series X systems.
- Effective cable management and proper clearance (4-6 inches on all sides) are critical: blocked ventilation vents trigger thermal shutdowns and performance drops during gameplay.
- Console-specific stands for PS5, Xbox Series X/S, and Nintendo Switch offer tailored features like integrated cooling fans and controller charging docks that universal options cannot match.
- Budget-conscious gamers can build functional DIY gaming console stands using IKEA shelves, wooden crates, or PVC pipes for $10-30, though commercial stands provide warranty protection and convenience.
- Monthly maintenance including dust removal, structural inspection, and temperature monitoring keeps stands functioning optimally and prevents long-term performance degradation.
Why Every Gamer Needs a Dedicated Console Stand
Dropping $500 on a console and then letting it sit in a poorly ventilated corner is like buying a sports car and never changing the oil. A proper stand isn’t just furniture, it’s infrastructure that extends hardware lifespan and improves day-to-day usability.
Protecting Your Investment from Overheating and Damage
Modern consoles generate significant heat during gameplay. The PS5’s custom SSD and GPU can push internal temps above 65°C under load, while the Xbox Series X’s vapor chamber cooling system requires consistent airflow on all sides. Without proper elevation and ventilation, these systems throttle performance or trigger thermal shutdowns.
Heat-related issues caused by poor placement:
- Performance drops during extended sessions (frame rate dips, texture pop-in)
- Accelerated fan degradation from constant high-speed operation
- Shortened component lifespan, especially for SSDs and thermal paste
- Increased risk of dust accumulation in intake vents
A quality stand elevates the console off surfaces, creates clearance for intake and exhaust vents, and positions the system where ambient airflow can do its job. Some stands integrate active cooling fans, though passive designs with proper spacing often suffice for most gaming environments.
Physical protection matters too. Consoles placed on unstable surfaces risk getting knocked over by pets, kids, or an enthusiastic victory gesture. A dedicated stand with non-slip bases or locking mechanisms prevents those heart-stopping moments when hardware teeters on the edge of a desk.
Maximizing Space in Your Gaming Setup
Desk real estate is finite, especially for gamers juggling a monitor, keyboard, mouse, microphone, and streaming gear. A vertical stand can reduce a console’s footprint by 60-70% compared to horizontal placement, freeing up room for peripherals or a second monitor.
Multi-tier stands take this further by stacking consoles vertically or creating dedicated zones for different devices. Someone running both a PS5 and Xbox Series X can keep both systems accessible without sacrificing an entire entertainment center. Wall-mounted options eliminate floor or desk space entirely, a game-changer for small apartments or dorm setups.
Storage integration is where stands prove their value beyond just holding a console. Built-in shelves or hooks for controllers, headsets, and game cases consolidate everything into one zone. No more digging through drawers for a second controller during a couch co-op session, everything’s visible and within arm’s reach.
Types of Gaming Console Stands: Finding Your Perfect Match
Console stands fall into distinct categories, each solving different spatial and functional challenges. Choosing the right type depends on how many systems someone owns, available space, and whether they prioritize aesthetics or pure utility.
Vertical Stands: Space-Saving Solutions for Modern Consoles
Vertical stands flip consoles from their default horizontal orientation to stand upright, drastically reducing desk or shelf footprint. The PS5 and Xbox Series X were designed with vertical placement in mind, featuring bottom-mounted intake vents and top exhaust ports that align with natural heat convection.
Key advantages:
- Reduces surface area by 50-70%
- Showcases console design (the PS5’s white panels look sharp standing tall)
- Often includes controller charging docks at the base
- Some models add LED lighting for visual flair
Considerations: Vertical placement requires absolute stability. A wobbly stand or uneven surface can lead to disaster. Look for weighted bases or rubberized feet. Also verify the stand doesn’t obstruct disc drives or USB ports, cheaper models sometimes block access to critical I/O.
Horizontal Stands and Entertainment Centers
Traditional horizontal stands and entertainment centers suit gamers who prefer the classic console orientation or have limited vertical clearance (like shelves in IKEA Kallax units). These range from simple elevated platforms with ventilation cutouts to full media centers with multiple shelves.
Best for:
- Retro consoles (PS2, Xbox 360) that weren’t designed for vertical use
- Systems placed inside TV stands or entertainment units
- Setups where the console doubles as a media player for family use
Modern horizontal stands often incorporate cable management channels underneath and ventilated surfaces to prevent heat buildup. Entertainment centers designed for gaming should have open backs or mesh panels, closed cabinets trap heat and reduce console lifespan.
Multi-Tier and Multi-Console Stands
Multi-tier stands stack multiple consoles vertically or arrange them on tiered shelves, ideal for collectors or households with multiple systems. A single unit might hold a PS5, Nintendo Switch dock, and a retro console simultaneously.
These stands excel at organization but require careful planning:
- Ensure each tier has sufficient ventilation spacing (minimum 3-4 inches clearance)
- Verify weight capacity per tier, stacking a PS5 (9.9 lbs) on top of an Xbox Series X (9.8 lbs) demands solid construction
- Check that power outlets and HDMI switching are accessible for all systems
Some gaming-focused hardware reviews highlight models with integrated USB hubs and power strips, consolidating everything into one tower.
Wall-Mounted Console Holders
Wall-mounted holders treat consoles like wall art, using brackets or shelves to float systems above desks or entertainment centers. This approach maximizes floor space and creates a clean, minimalist aesthetic.
Requirements for safe wall mounting:
- Sturdy wall anchors rated for at least 20 lbs (consoles are heavier than they look)
- Proper stud mounting for heavy systems like the PS5
- Clearance on all sides for ventilation (minimum 4 inches)
- Cable management solutions since wires dangle more noticeably
Wall mounts work beautifully in dedicated gaming rooms but aren’t ideal for renters who can’t drill into walls. Damage deposits aren’t worth it.
Key Features to Consider When Choosing a Console Stand
Not all stands are created equal. The difference between a $15 Amazon special and a $60 engineered stand often comes down to details that directly impact console longevity and user experience.
Ventilation and Cooling Design
Ventilation is non-negotiable. A stand that blocks intake or exhaust vents defeats its entire purpose. When evaluating cooling design, look for:
- Open architecture: Mesh surfaces, perforated metal, or slatted designs that encourage airflow
- Vent alignment: Cutouts that match console-specific intake/exhaust locations
- Active cooling (optional): Built-in USB-powered fans that supplement console cooling systems
Active cooling fans are controversial. Some gamers swear by them for extended sessions in hot climates, while others argue they introduce unnecessary noise and potential failure points. Passive cooling through intelligent spacing usually suffices if the gaming space has decent ambient airflow.
Temperature testing matters: some stands actually increase internal temps by trapping heat in enclosed spaces or using materials that insulate rather than dissipate thermal energy. Metal stands with perforations outperform solid plastic designs in most thermal tests.
Build Quality and Weight Capacity
A stand collapsing under a $500 console is a nightmare scenario. Build quality indicators include:
- Material: Steel or aluminum frames outlast plastic. Tempered glass looks premium but adds fragility.
- Weight rating: Should exceed console weight by at least 50%. A PS5 at 9.9 lbs needs a stand rated for 15+ lbs minimum.
- Stability features: Wide bases, rubberized feet, or weighted bottoms prevent tipping.
- Weld quality: For metal stands, inspect weld points and joint construction.
Cheap stands often use thin gauge steel or low-grade plastic that warps over time, especially under heat. Reading user reviews for reports of sagging shelves or structural failure after a few months reveals quality issues manufacturers won’t advertise.
Storage for Controllers, Games, and Accessories
Integrated storage transforms a stand from a simple platform into a complete gaming hub. Useful storage features include:
- Controller hooks or cradles: Keep controllers off surfaces and prevent joystick drift from accidental impacts
- Game disc/case slots: Vertical slots or shelves for physical media
- Headset hangers: Dedicated hooks prevent cable damage and crushing
- Accessory drawers: Small compartments for charging cables, batteries, or cleaning supplies
Some stands include charging docks for controllers, eliminating the need for separate charging stations. Verify compatibility, PS5 DualSense charging differs from Xbox controllers, and not all docks support both.
Cable Management Systems
Tangled cables aren’t just ugly, they restrict airflow and make cleaning impossible. Effective cable management involves:
- Routing channels: Grooves or clips on stand backs that guide cables
- Velcro straps or ties: Bundling power, HDMI, and Ethernet cables separately
- Hidden compartments: Concealed areas for power strips or cable slack
- Labeled ports: Some premium stands label routing channels for specific cable types
Many setup tutorials recommend leaving slight slack in cables to allow for movement without strain on ports. Over-tightening cable ties can damage sheathing over time.
Console-Specific Stands vs. Universal Options
The choice between console-specific and universal stands comes down to precision vs. flexibility. Dedicated stands offer tailored fit and features: universal options provide future-proofing and multi-system support.
PlayStation 5 Stand Solutions
The PS5 ships with a basic stand for both vertical and horizontal orientation, but third-party options add functionality Sony’s doesn’t provide.
Popular PS5 stand features:
- Integrated cooling fans: USB-powered fans that supplement the PS5’s internal cooling
- DualSense charging stations: Dual controller charging docks with LED indicators
- Disc storage: Slots for physical game cases
- RGB lighting: Because why not?
The PS5’s unusual shape (14.1″ tall in vertical mode) makes compatibility critical. Verify stands accommodate the console’s curved panels and don’t obstruct the disc drive on PS5 Standard models. Digital Edition owners have more flexibility since there’s no disc slot to worry about.
Xbox Series X and Series S Stand Options
The Xbox Series X was designed primarily for vertical placement, with its monolithic tower shape and top-mounted exhaust. The Series S, being smaller and budget-focused, works well in both orientations.
Series X stand considerations:
- Most stands are simple bases since the console is already vertical-optimized
- Look for ones with controller charging (Xbox batteries are still AA-based or require Play & Charge kits)
- Weight capacity matters, the Series X is deceptively heavy at 9.8 lbs
Series S stands often incorporate more storage since the console itself is compact (10.8″ x 5.9″ x 2.5″). Some users stack the Series S horizontally in entertainment centers without a dedicated stand, though proper ventilation remains critical.
Nintendo Switch Docking Stations and Stands
The Nintendo Switch technically includes a dock, but third-party stands address its limitations: bulky design, limited ports, and overheating concerns in enclosed spaces.
Upgraded Switch stands offer:
- Adjustable viewing angles: For tabletop mode gaming
- Additional USB ports: Extra connections for controllers or accessories
- Compact travel designs: Foldable stands for portable gaming
- Better cooling: Open designs that prevent the heat buildup Nintendo’s dock is notorious for
Some docks add HDMI pass-through and Ethernet ports, though Nintendo’s official licensing for docks is strict. Third-party docks have occasionally bricked consoles in the past, so stick with reputable brands with warranty coverage.
Retro Console Display Stands
Collectors and retro enthusiasts face unique challenges with older hardware. Retro stands balance display aesthetics with functional needs like:
- Acrylic display cases: Dust protection for consoles not in regular use
- Shelving units: Open shelves that showcase multiple consoles (NES, SNES, Genesis, etc.)
- Ventilation for CRT setups: Stands that support both console and period-appropriate displays
- Cable management for multiple systems: Routing for RF, composite, and SCART connections
Retro consoles often need more horizontal space than modern systems. A Sega Saturn (10.6″ x 11.3″) has a larger footprint than a Series S. Displaying console comparisons side-by-side requires measuring before buying shelving units.
Setting Up Your Console Stand for Optimal Performance
Buying the right stand is half the battle. Proper setup ensures the console runs cool, stays stable, and integrates seamlessly into the gaming environment.
Proper Placement and Clearance Requirements
Console manufacturers publish specific clearance recommendations, though they’re often conservative to cover worst-case scenarios.
Minimum clearance guidelines (2026 standards):
- PlayStation 5: 4 inches on all sides, 6 inches above for exhaust
- Xbox Series X: 4 inches on sides, 4-6 inches top/back
- Xbox Series S: 3 inches on all sides
- Nintendo Switch dock: 2 inches minimum, more if enclosed
These measurements assume room temperature below 75°F. Gaming in hotter environments or during summer heat waves may require additional spacing. Placing consoles in direct sunlight or near heating vents is asking for thermal issues.
Ideal placement locations:
- Open shelves with back ventilation
- Desktop stands with 360-degree airflow
- Wall-mounted positions with free air circulation
- Elevated platforms on media centers (not inside closed cabinets)
Locations to avoid:
- Enclosed cabinets without ventilation fans
- Carpeted floors (blocks intake vents and collects dust)
- Next to heating sources or in direct sunlight
- Unstable surfaces prone to vibration
Organizing Cables and Power Management
Console cable management follows a simple hierarchy: power, video, network, then peripherals.
Step-by-step cable organization:
- Route power cables first: Run power from the console to outlet/power strip, securing with clips or ties
- Add HDMI: Keep video cables separate from power to reduce electromagnetic interference
- Network connections: Ethernet cables (preferred) or ensure Wi-Fi has clear signal path
- Controller charging: USB-C or charging dock cables to accessible ports
- External storage: USB 3.0 cables for external SSDs/HDDs
- Headset/microphone: Last priority, routed away from heat sources
Leave 6-12 inches of slack at connection points. This prevents strain if the console shifts slightly and makes maintenance easier. Velcro ties beat zip ties since they’re reusable and don’t risk cutting into cable sheathing when over-tightened.
Power strip placement matters more than most realize. Positioning it behind or under the stand keeps it accessible for plugging in new devices while hiding the visual clutter. Surge protection is mandatory, a $20 surge protector can save $1000+ in hardware.
Common Mistakes to Avoid with Console Stands
Even experienced gamers make setup errors that compromise performance or risk hardware damage. These mistakes are easy to make but just as easy to avoid with awareness.
Blocking Ventilation Ports
The most common mistake is placing stands or objects that obstruct critical airflow paths. Each console has specific intake and exhaust locations:
PS5 ventilation:
- Intake: Bottom and side panels
- Exhaust: Rear top portion
- Common mistake: Pushing the console flush against a wall, blocking rear exhaust
Xbox Series X ventilation:
- Intake: Bottom panel
- Exhaust: Top grill
- Common mistake: Placing objects on top of the console (like controllers or games)
Xbox Series S ventilation:
- Intake: Bottom and side vents
- Exhaust: Top panel
- Common mistake: Laying horizontally without proper stand, blocking side intakes
Visual inspection helps: if vents aren’t visible or dust accumulates rapidly around openings, airflow is restricted. Running a console with blocked vents can trigger thermal protection shutdowns mid-game, nothing kills momentum in a ranked match faster.
Ignoring Weight Limits and Stability
Consoles are heavier than their sleek designs suggest. Adding external SSDs, disc drives full of games, or stacking accessories compounds this weight.
Weight distribution mistakes:
- Placing heavy consoles on flimsy stands rated for lighter devices
- Stacking multiple systems without checking per-tier capacity
- Ignoring dynamic load, a console plus vibration during disc reading
- Using stands with small footprints that raise center of gravity
Stability issues show up gradually. A stand might hold a console fine initially but warp over months under constant weight and heat. Sagging shelves or tilting bases are warnings to replace the stand before catastrophic failure.
Another overlooked factor: earthquake or pet-proofing. Gamers in seismic zones or homes with large dogs need stands with anti-tip features or securing mechanisms. Museum putty or earthquake gel can anchor stands to surfaces without permanent mounting.
DIY Console Stand Ideas for Budget-Conscious Gamers
Not everyone wants to drop $50-100 on a stand, and DIY solutions can match or exceed commercial options with creativity and basic tools.
Simple DIY console stand projects:
1. IKEA Lack Shelf Mod
The IKEA Lack shelf ($10-15) works as an instant elevated stand. Add adhesive rubber feet on corners for extra elevation and airflow underneath. Paint or wrap it to match setup aesthetics.
2. Wooden Crate Console Stand
Wooden crates from craft stores ($5-10) provide rustic stands with built-in ventilation gaps. Sand rough edges, flip upside down for stability, and add felt pads to prevent scratching surfaces.
3. PVC Pipe Framework
For multi-console setups, PVC pipes and connectors create custom-sized frames. Cut pipes to desired shelf heights, connect with elbow joints, and top with tempered glass or wood shelves. Total cost: $20-30 for a three-tier stand.
4. Repurposed Monitor Stand
Adjustable monitor stands (often found at thrift stores) work surprisingly well for horizontal console placement. They’re already designed for weight and often include cable management features.
5. Concrete Block and Wood Plank
Industrial aesthetic on a budget: stack concrete blocks as supports, lay a stained wood plank across them. Sounds crude but looks sharp in the right setup and costs under $15.
DIY considerations:
- Measure twice, build once: Verify console dimensions before cutting materials
- Ventilation by design: Ensure DIY stands don’t accidentally create enclosed heat traps
- Weight testing: Test with something heavier than the console before placing expensive hardware
- Fire safety: Avoid flammable materials near power supplies or in enclosed spaces
DIY stands work best for gamers who enjoy customization and have basic tools (saw, drill, sandpaper). The trade-off is time vs. money, commercial stands offer convenience and warranties, while DIY provides uniqueness and satisfaction.
Maintaining Your Console Stand and Gaming Station
A stand isn’t a set-it-and-forget-it purchase. Regular maintenance keeps consoles running cool and prevents long-term issues that degrade performance.
Monthly maintenance checklist:
Dust removal:
- Wipe stand surfaces with microfiber cloths to prevent dust transfer to console vents
- Use compressed air on console vents (1-2 second bursts from 6 inches away)
- Check intake vents for pet hair or debris buildup
- Clean stand ventilation holes or mesh with a soft brush
Structural inspection:
- Check for loose screws or weakening joints on multi-tier stands
- Inspect weight-bearing surfaces for warping or sagging
- Verify rubberized feet haven’t degraded or lost grip
- Look for stress cracks in plastic components
Cable management review:
- Ensure cables haven’t shifted to block vents
- Replace frayed or damaged cables immediately
- Re-tighten cable ties that have loosened over time
- Check that cable slack hasn’t created trip hazards
Temperature monitoring:
- Feel console surfaces during gaming, excessive heat indicates ventilation issues
- Listen for increased fan noise (sign of thermal stress)
- Check room ambient temperature, especially in summer
- Verify stand placement hasn’t inadvertently shifted near heat sources
Quarterly deep cleaning:
Every 3-4 months, perform a more thorough clean:
- Power down and unplug console
- Remove console from stand
- Clean stand thoroughly with appropriate cleaner for material (wood polish, metal cleaner, etc.)
- Inspect console exterior for dust buildup
- Check all cable connections for corrosion or looseness
- Reassemble with fresh cable management
For stands with active cooling fans, clean fan blades quarterly to prevent dust accumulation that reduces airflow efficiency. Some USB-powered fans include removable filters that need washing or replacement.
Signs a stand needs replacement:
- Visible warping or structural damage
- Console wobbles or tilts even though level surface
- Material degradation (cracking plastic, rusting metal)
- Inadequate ventilation causing thermal issues
- Outgrowing capacity (adding more consoles than stand supports)
Console stands typically last 3-5 years with proper care, though budget models may need replacement sooner. Higher-quality stands can last a decade or more, making the upfront investment worthwhile for serious gamers.
Conclusion
A gaming console stand does more than hold hardware, it protects investments, optimizes performance, and creates order in what can easily become a chaotic tangle of devices and cables. Whether it’s a $15 DIY solution or a $100 multi-tier charging station, the right stand pays dividends in cooler operating temps, longer hardware lifespan, and a cleaner gaming environment.
The best stand matches specific needs: vertical stands for space-saving, horizontal options for media center integration, multi-tier for collectors, or wall-mounted for minimalist setups. Prioritizing ventilation, build quality, and smart cable management ensures the stand enhances rather than hinders the gaming experience.
As consoles continue pushing performance boundaries and generating more heat, proper setup becomes increasingly critical. A few inches of clearance and thoughtful placement can mean the difference between a console lasting five years or ten. For gamers building their setup in 2026, treating the stand as essential infrastructure, not an afterthought, sets the foundation for years of reliable gaming.